Frequently asked questions

We are working on the xlCompare every day, so features present in the software constantly grows. The more features we add - the more questions appear. Hope, this topic will cover all possible questions.
We suggest you to send us your questions about xlCompare. This helps us to make the software better and give you robust tool for everyday use!

FAQ: Find Answer to your question

FAQ: What are the options I need to know

If you open Options window in the xlCompare you may be a bit confused - this application has a lot of options. How to learn and use all of them.
Options window in xlCompare
xlCompare works with different kinds of worksheet data and gives you a number of options to tune up the comparison results. Most of the options changes some visual options of the software or allows to change the formatting or delimiter for text files.
All these options are rarely used and 90% of users normally don't change the default behavior. However, there are 2 pages you need to know about.

Comparison Rules

Rules tab in Options window
This is the most important page in the options. It defines set of rules used by the application to compare data on the Excel worksheets.
Here you can allow to ignore some minor typing mistakes in string values, ignore case in the text cells, ignore specific characters and specify the numeric accuracy.
Allow key values to be changed on your worksheets
Imaging that you are working with 2 worksheets where one file contains record about John Smith, and in the second file there is a typing error and name was imported as John Smitn.
xlCompare highlights you this difference as 2 unique rows - one colored with green and another one colored with red.
But this does not work for you, as you need to compare data for the John Smith from both files.
Use this option to allow difference in 1 character in the compared files. This will force xlCompare to think that both values are identical.
However, xlCompare will point you to the change in this cell. Both rows will be considered as matching and will be compared one versus one. This cell with username will be highlighted with orange color.
Rows that begin with N equal cells are identical
Imaging two rows where most of the cells are different. Should xlCompare consider them as unique and highlight with green and red fill color, or mark them as matching and compare one versus one?
This option is one of the rules that helps xlCompare to make the decision.
You can specify number of equal cells on the beginning of the row, that should advice xlCompare to that these rows are matching.
Rows having N or less different cells are identical
Next rule that solves same task - you manage the process of finding the matching rows.
This rule defines a limit, where xlCompare should think that rows are different or matching.
This is very simple criteria, and it can't be used in the general case, but you can use for the pair of specific worksheets to get the most accurate comparison results.
Case-insensitive comparison
You've got 2 worksheets where one contains record for John Smith starting his name from the capital letter and in the other file his record was imported as john smith.
But using this option you can ignore this difference or make it important and xlCompare will highlight it for you.
Ignore space characters
Again, this is a way to adjust the results of comparing text values.
Extra space in the username leads to thinking that this value is different. Trailing spaces in the values exported from the database or copied from the webpage produce a lot of unique values on the worksheets, instead of comparing them as matching.
So, this option is enabled by default.
But if you need to perform strict comparison to the find the exact compliances, you can turn it OFF.
Ignored Symbols
Here you can enter symbols that are not important.
Imagine that you've got two files, imported from the external database and one of them contains a lot of @ and # symbols on the character positions.
Should you edit all the file manually?
No. You need only to mark these symbols are ignored and that will not be considers when comparing string cells.

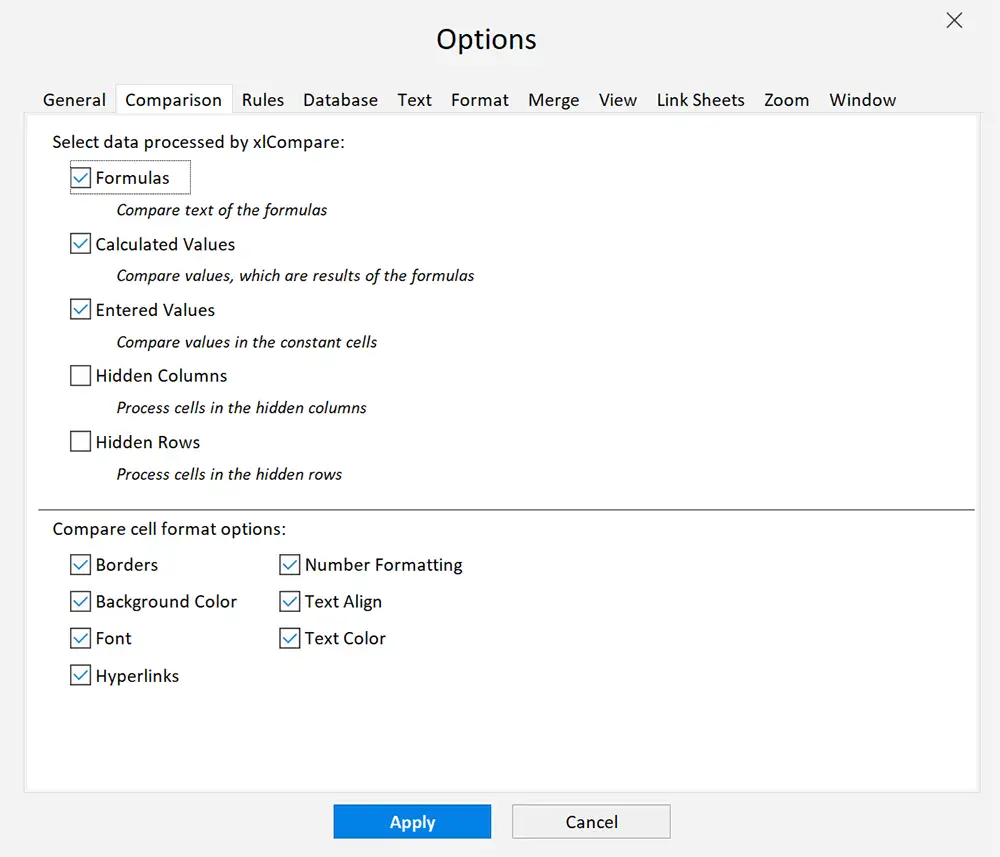
Comparison Options: what data is processed by xlCompare

Comparison tab in Options window
On this page all the options speak for itself.
You can ignore formulas and compare only their values.
Ignore constant cell values (input cells) on the worksheets and compare only calculated values, or only text of the formulas.
Compare only cell values on the sheets by excluding text of the formulas.
Cell styles are often producing differences that are highlighted with yellow color. On the large worksheets you may got a million of the reported cells and all of them are not important for you.
Exclude styles from comparison and xlCompare will focus on the cell values and formulas. This is a great option to reduce the comparison noise.

Conclusion

As you see xlCompare has a lot of options.
We've configured them in the way that should give you best results out of the box, so you should not tune the software.
You should not learn all the options in the product. But these two pages are important, so we suggest you take a brief look at them. Possible sometimes this information will help you.

FAQ: Ignore Case when comparing String Cells

Does the xlCompare distinguish small and capital letters on the worksheets?

Yes, sure. xlCompare takes case of the letter into account. However, this is managed by the option.
In the typical case strings like Account and account should be marked as identical. When you are getting data from the different sources, the most likely you will have a text value with mismatching case.
But if this difference is important for you - turn this option OFF and xlCompare will bring you all these differences. You will get all such values highlighted with orange color as regular changed cells.

Where to find this option?

It is located on the Rules tab on the Application Options.
Option Ignore case in string cells

FAQ: List of xlCompare hotkeys

xlCompare uses several hotkey combinations you need to know to performs all the operations quickly.
Hotkeys are saving your time and makes you more efficient.

F6 Start the comparison

After you press F6 xlCompare will compare opened Excel files. Use this key after you've made a modification in your files and need to restart the comparison.
The difference between F6 and Compare Files command on the Ribbon - F6 doesn't show the comparison wizard. It just restarts the comparison using the previous settings.

F12 Close All Files

Close both files you have opened in xlCompare. If you have a comparison report on your screen - xlCompare close it also.

Ctrl+1

Set Zoom on both files to 100%. This allows to quickly restore zoom if you have changed it.

Ctrl+2 2-File comparison

Turn OFF 3-File comparison option. Switch to 2 panels mode.

Ctrl+3 3-File comparison

Turn ON 3-File comparison option. xlCompare opens additional panel for 3-rd file.

Ctrl+H Recent Items

History of the comparisons. This window shows you all recent comparisons.
If you double-click on one of the items - xlCompare reopens this comparison again for you.

Ctrl+K Edit Primary Keys

This hotkey opens window where you can edit primary keys on your worksheets.

Ctrl+L

Show or hide Left Panel.

Ctrl+R

Show or hide Right Panel.
These 2 options allow to display only one workbook on your screen. Use this option if you need more space for your data.

Ctrl+T (Alt+O) Options

Call the options window. Edit comparison rules, select what data is processed by xlCompare, change visual options of the application.

Alt+Z Zoom

Brings the Zoom window where you can change zoom applied to your workbooks.

Alt+F11 VBA Editor

This hotkey is identical to Excels combination that opens Visual Basic editor. xlCompare shows you contents of the Visual Basic project by pressing this key.

FAQ: How to tune up the comparison results

xlCompare tries to give you best possible comparison results out of the box.
You should not select options and modify your data to change the output. However not all the cases are so simple. In some cases, you can change the criteria used by xlCompare to make the conclusion about equal or changed data.
Here we will describe some common situations and give our suggestions.

Two columns containing almost identical data are marked as unique

This could happen if column headings are different.
If field names are not identical, they should be considered as different. This the normal behavior for the database fields.
Use Link columns command to bind one column to another in the comparison report and to modify this.
After columns are linked, they will always be marked as matching without checking their names.

Two keys that should be identical are highlighted as unique

Possible they contain extra space character or extra space value.
Check contents of two cells to make sure that they are identical.

Some keys contain typing mistakes

Use option to allow N characters in cells to be different. According to this rule xlCompare ignores limited number of differences in values and marks values as matching.
This changes the comparison results, because matching key values leads to marking corresponding rows as matching on the worksheets.

There are extra characters in strings

Your file is a result of the exporting from database and some cells contain special characters like $ of #.
Put this symbol into list of ignored symbols and xlCompare will not take them into account. They will be excluded from the values.

Rows containing a lot of changed values are marked as unique

When 2 rows don't match exactly, xlCompare should make a decision - are these rows matching or not.
On the Rules tab in Options window, you can change default behavior.
There are 2 options you need to use:
  • Rows that begin with N equal cells are matching
  • Rows containing not more than N difference cells are matching
For example, you are comparing price list or the cash flow financials statements. Possible only 1 or two cells in the first column are equal, all other cells that represent numbers are different.
These options allow to mark rows that begins with 2 equal cells on the similar positions on the worksheets as matching.
In this case comparison report will be different from the report with this option turned off.

FAQ: Working with small display

We are extensively using laptops in our business. Laptops gives us perfect mobility and flexibility. Armed with laptop you can work from anywhere. But this type of computer has significant disadvantage: small size of the display. While you can use 32 inches display on your desktop and work very comfortable, most modern business laptops will give you 14 or 15 inches.
So, if you are using laptop, you are very limited in screen size. Scrollbar allows you to see all the content, but much better to see as much as possible information on the screen without scrolling.
How xlCompare helps laptop users.

Collapse the Ribbon

Starting from xlCompare 11 you can collapse the ribbon to get more space on your screen. Ribbon takes some space on the top of the window and in the collapsed state it will give you several additional rows.
Expended ribbon control
xlCompare window with expanded ribbon control
Collapsed ribbon control
xlCompare window with collapsed ribbon control
To expand or collapse the ribbon use button highlighted with red arrow on the image above.

Hide comparison results

Difference Explorer window that contains the complete list of the differences occupies space on the bottom of xlCompare window.
In version 11 it is hidden by default. So, at least 30% of your screen is available for the worksheet data.

Turn off Extended View

Extended View is a perfect option that displays modified value below the original, that it very handy. But it duplicates height of the row.
If this option is disabled, all the rows keep their original size. So, you get more data on your screen.
To get the corresponding value of the modified cell quickly, put your mouse over this cell. Tooltip window will show you detailed information on the modification, including value and formula of the corresponding cell.

Use Zoom

Changing zoom from 100% to 80% has small impact to readability but gives you 20% more data.
Use Ctrl+1 hotkey combination to open Zoom window and select preferable zoom on for worksheets.

FAQ: Important commands

What is Extended View?

This is an important feature, which displays cell value(formula) and the corresponding value in same cell. With this option turned ON (default selection), you won't need to search for the corresponding value on the other panel. It greatly saves your time and increases the usability of the Comparison Report.

I need to see the Difference between changed values.

The Option Display Difference activates the feature you need in the Extended View mode. With this option enabled, you can see difference between value in the MINE cell and value in the THEIR cell. The Colored Arrow mark indicates an increase or decrease in the value.

Can I save the report I see in the Extended View?

Yes, sure. You can export this report in a PDF format for future use. For example, you can print it or send to your co-worker.

Does xlCompare find differences in formulas?

Yes. xlCompare finds differences in the text of formulas, and the text of an array formula. However, if you don't need to compare formulas, you can exclude this in the options. xlCompare gives you a rich set of options to control what you are searching for. You can compare:
  • All worksheet data
  • Only constant cells
  • Only calculated cells
  • Only text of formula
  • Only value of formula
  • Combination of the options above

How to identify differences, found between two Excel worksheets?

All differences are listed in the Difference Explorer report. When you select difference in this list - xlCompare will activate it in the Worksheet\VBA Panel.
All unique rows and changed cells are marked with color - background, text color and border. Formatting in the equal cells will not be changed.

Can I ignore hidden rows and columns?

Yes.xlCompare has an option to exclude hidden rows and columns from the comparison. If your worksheet has data you want to exclude, hide it and run the comparison. This is one of the methods to reduce comparison noise.

How to save the Comparison Report to present it to colleagues?

There are two options. You can print the Comparison Report exactly as it looks with all formatting into the PDF format, or use the Export button, with the PDF icon in the Difference Explorer.
Export PDF Report
It opens Print Preview window, where you can preview your report, change printing options - put all columns on one page, align printout, etc. and save it on disk.
This report perfectly presents all differences, found between Excel Worksheets.
PDF Report
Other option - Summary Report button in the Difference Explorer.
Summary Report
This command generates an outlined report, which contains all items you have in the Difference Explorer. It doesn't display modifications in-place, like a previous PDF report, but it gives you a complete summary of the comparison done.
Choose one of the following formats to save this report:
  • XLSX
  • HTML
  • Text
Or just copy it to clipboard and paste it into e-mail or another application.

F.A.Q. General

What is xlCompare?

xlCompare is Excel Workbook Comparison Tool, that helps you to find and merge differences between Excel worksheets, tables and Visual Basic Modules. xlCompare checks all parts of your workbook: constant cells, formulas, array formulas, cells formatting and VBA Forms and Modules.

How the differences are highlighted?

Every highlighted cell with difference gets new text color, fill color and border.

Is the highlighting permanent?

No. xlCompare doesn't change original formatting. Difference Report you see is virtual. If you need to format changed cells with color - use Mark Changes command in the Difference Explorer.

Where is Difference Explorer?

After comparison is completed Difference Explorer appears below worksheet panels.

How to compare two Excel worksheets?

This requires a few clicks:

  • Drop one workbook into the left sheet
  • Drop another book into the right panel
  • Press Compare button
  • In the opened Comparison Wizard select worksheets you want to compare and uncheck sheet you don't need
  • Press Compare button in the Wizard
  • Thats all. xlCompare shows you Comparison Report
Is it possible to Print of Export Sheets with Formatting?

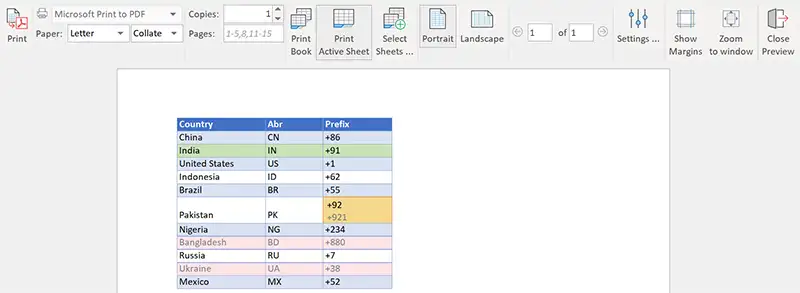
Yes sure! Use Print command in the Difference Explorer to export compared data with color formatting into PDF file ro to send it to printer.
Remember - color formatting is virtual. xlCompare doesn't change your workbook, whithout your command!

How to Save Workbook?

Use Save command above the worksheet. To save a copy of the file use Save As command. xlCompare saves book in the Excel format. XLS file is saved as XLS, XLSX as XLSX. Format of the original workbook is not changed.

I want to get previous version of my workbook

It is highly important to perform saving operation safely to aviod data loss. The most common technique, widely used by all applications, is to create backup file before it is saved. When saving is successfully completed application deletes backup file.

xlCompare uses this way also. The only difference - backup file is not deleted after saving. So, you can get access to the previous verson of your workbook.

Where backup is created?

Open My Documents folder on your PC. There is a xlCompare subfolder. In this subfolder you can find the next one - Backup. This is the folder where all backup files are stored:

Documents | xlCompare | Backup

How to identify the workbook in this folder? This is easy. Backup file is create with it's original name. xlCompare adds data and time of the backup creation to the file name. So, if you've saved Loan Calculator.xlsx on the 05/12/2020 at 13:07:45, the backup file is - Loan Calculator.2020-05-12 13-07-45.xlsx.

If something goes wrong and you need to restore original file - you can find it in the backup folder.

You are protected from the data loss, when you are using xlCompare!

F.A.Q. Activation

I've placed an order for xlCompare. How to activate my license?

After your order is processed, our server IMMEDIATE sends you an email with license information. Use it to activate Excel Compare on your PC according to this step-by-step instruction.

Activate xlCompare your PC

I've got new PC. How to transfer my license?

xlCompare license allows you to transfer purchased software to another PC. You can't use the software on 2 computers at the same time. But when you buy or restore your PC you can move you xlCompare in a minute. The procedure is very simple. Look into the page below to get step-by-step instructions:

Activate xlCompare on the other PC